Many, many years ago I had an experience of a lifetime, visiting Rio and living in a Favela. It was an amazing experience, and I could likely fill a blog with just stories from that time alone. Alas, I'm an old bugger now, limiting my adventures to the tabletop 😁
Recently I've been playing Skullcore, a moderns-styled shooter from Enemy Spotted Studios. The game has sparked my creative powers and I've been making a whole lot of terrain so that I can host a series of games. One table I'd been contemplating for a long time is that of a shanty town (aka a Favela in Brazil). Finally, inspiration and opportunity collided, and here are the results!
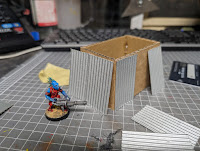
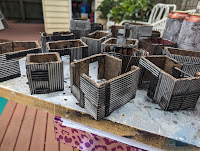
Did you want to know how to create such (cheap arse) wonders? The following pictures will save me a thousand words...
Preparation - Cardboard and lots of it.
Assembly - a sharp knife, ruler, scissors, credit card, and hot glue gun
Getting corrugated cardboard is quite straightforward. Most cardboard boxes have a corrugated layer sandwiched between two flat pieces - simply peel off one layer and you've got some cardboard. I also bought a sheet of corrugated cardboard for just a few buck from my neighborhood art shop, Deans Art.Painting - making it pretty
Firstly, I made a jar of 1/2 PVA + 1/2 Water + Black Acrylic Paint. I liberally painted all the faces of my buildings, doors and roofs. Adding black acrylic paint serves two purposes: it helps you work out what has been painted and also acts as a wash, darkening all the crevices in the models.So what next? I'm not sure... I might try and make some further buildings and scatter terrain - I've been thinking that some type of scaffolding might be good too. I'll let you know what comes of it.


No comments:
Post a Comment